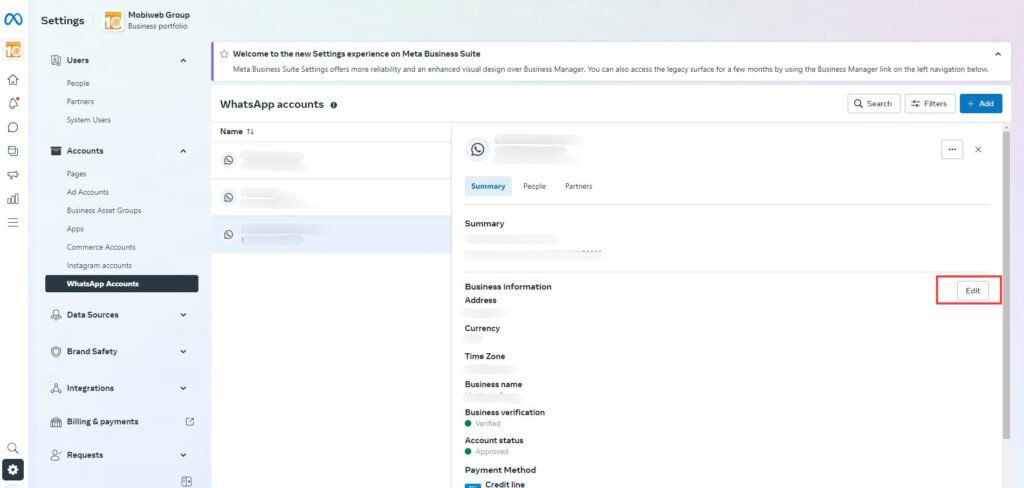
Steps to Change Your WABA Name on Facebook Business Account Please take note: This only applicable for WhatsApp Business API user. Log in to Facebook Business Manager: Go to the Facebook Business Manager.Log in with your credentials. Navigate to Business Settings: From the Business Manager homepage, click on the menu icon (three horizontal lines) in the top left corner.Select ‘Business Settings’ from the dropdown menu. Access Accounts and WhatsApp AccountsIn the Business Settings menu on the left, scroll down and click on ‘Accounts’.Under ‘Accounts’, select ‘WhatsApp Accounts’ Select the WhatsApp Account: You will see a list of WhatsApp Accounts linked to your Facebook Business Account.Select the WhatsApp Account you wish to edit. Edit Account Details: Click on the ‘Settings’ tab for the selected WhatsApp account.Look for the ‘Account Details’ section, where you can see the current business name. Change the WhatsApp Business Name: Click on the ‘Edit’ button next to the business name.Enter the new name you wish to use for your WhatsApp Business Account. Ensure that the new name complies with WhatsApp’s naming guidelines and policies. Submit and Save Changes: After entering the new name, click on ‘Save’ to submit the changes.You may need to wait for Facebook to review and approve the new name, which can take some time. Verification and Confirmation:Once the name change is approved, you will receive a confirmation notification.Your WhatsApp Business Account will now display the new name.