On this page
Before you start
- Complete WhatsApp onboarding and sign in to the portal with access to your activated business number.
- Have the message text, any media or links, and realistic sample values ready.
- Use a test recipient who has agreed to receive your messages, and check the selected sender’s credit balance.
Screenshots show the shared iSMS portal used in these instructions. iSMS and iwsapp.my are operated by Mobiweb Sdn Bhd. Your enabled features and menu labels may vary by account.
1. Build the template
- Open the template builder
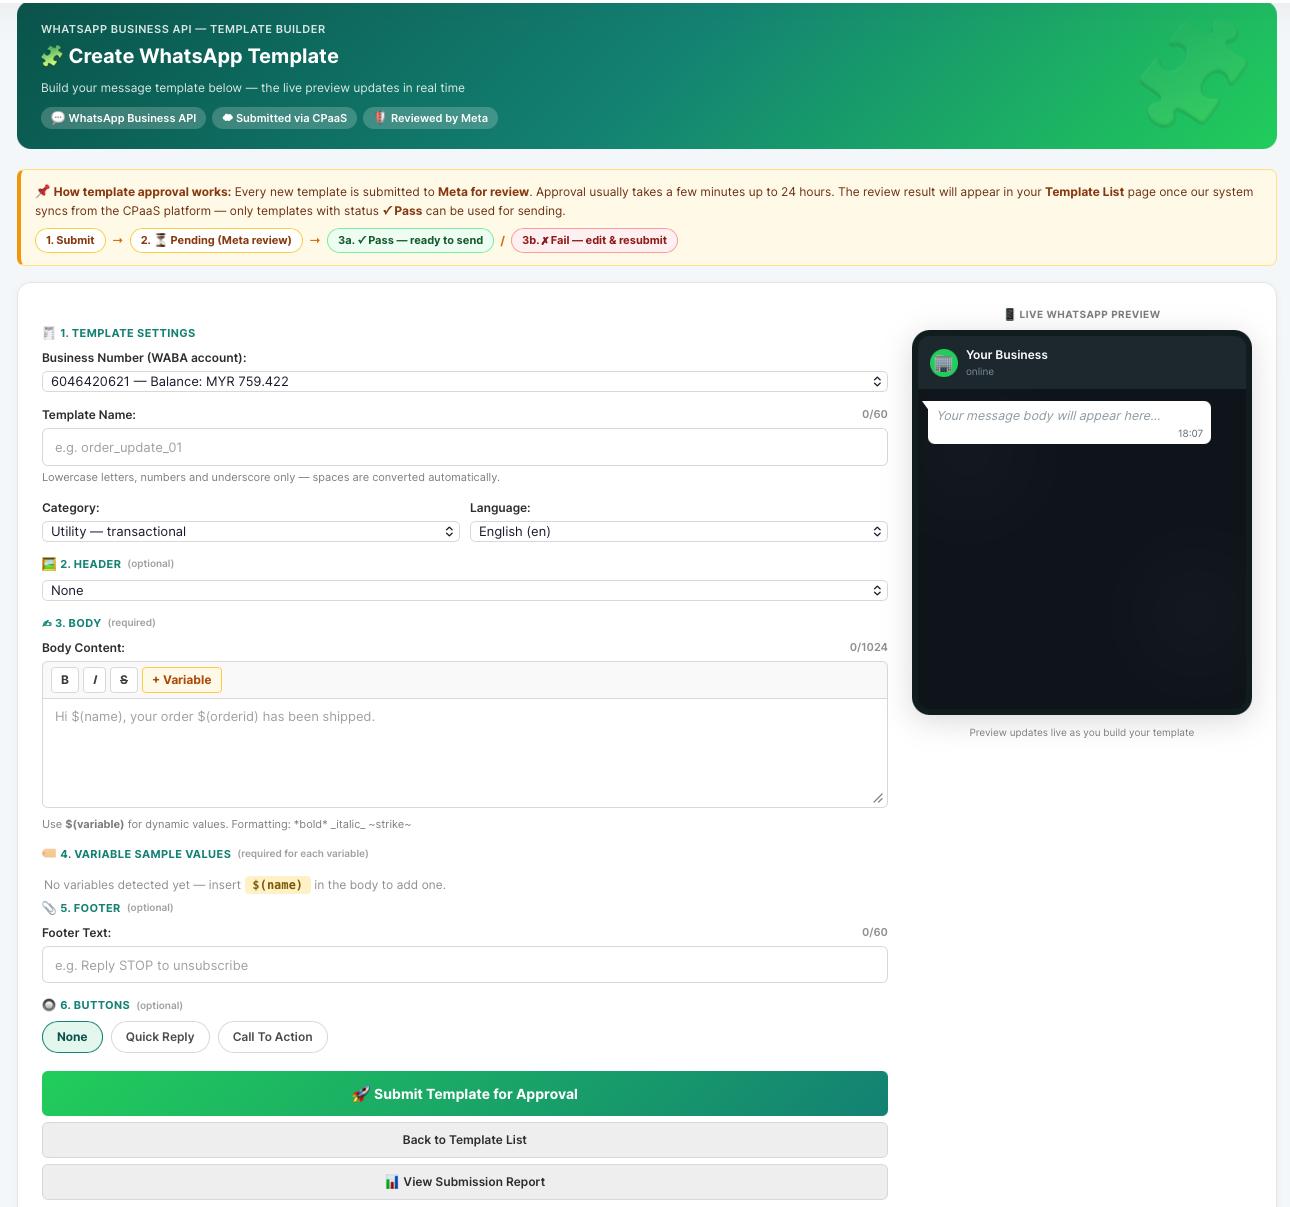
Under WhatsApp Business API, open Manage Template. Select the Business Number you intend to use.
- Choose the name, category and language
Use a descriptive template name with lowercase letters, numbers and underscores, such as
order_update. Select the category that matches the actual message and choose its language. The template overview explains the categories; this tutorial covers the portal steps. - Write the content
Add an optional header, then the message body. Use + Variable for customer-specific values such as
$(name)and$(orderid). Fill in the sample values requested by the builder so the intended message is clear during review. - Check the finishing details
Add a footer or buttons if needed. For an image, video or document header, provide the sample media URL requested by the form and check that it is publicly accessible. Review the preview for spelling, links and missing variables.
Example body: Hi $(name), your order $(orderid) has been dispatched. Thank you for shopping with us.
This is an illustrative order-update message, not a promise of approval. Use content that accurately reflects your business and the customer’s transaction. Authentication messages use a dedicated format; see our WhatsApp OTP overview if that is your use case.
2. Submit and check approval
Click Submit Template for Approval, then use View Submission Report to follow the submission and review result. Approval is a review step, not an immediate consequence of saving the form.
- Pass: the supplied portal guide uses this status for a template that is ready to send.
- Fail: read the rejection reason, correct the relevant content and follow the portal’s resubmission process.
- Still awaiting review: check again later. Review and portal synchronisation times can vary.
In Template List, confirm that you are looking at the correct business number, template name and language. If the status is unclear or the template is missing, contact support with those details. Do not share your password or API secret.
3. Send a test message
- Open the approved template
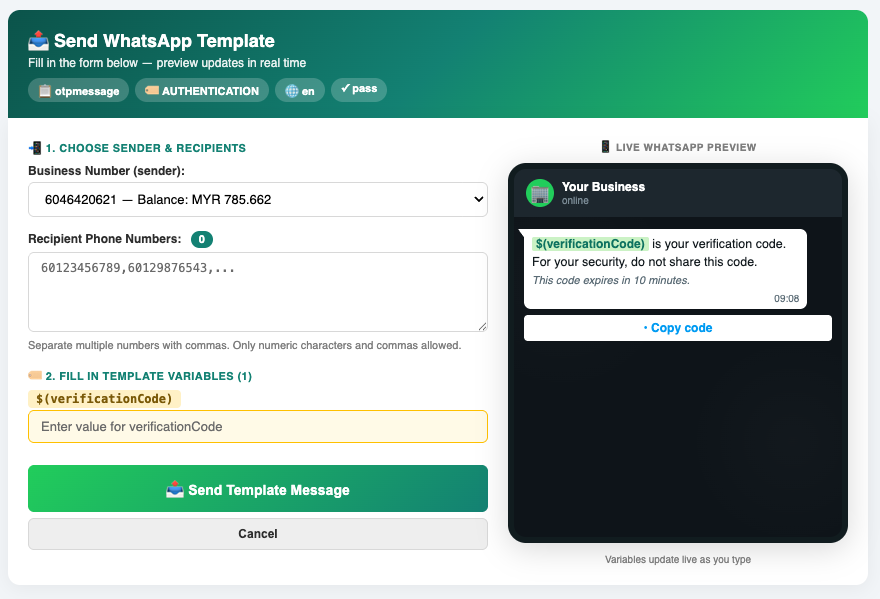
Go to Template List, find the template, then choose Actions → Send.
- Confirm sender and recipient
Select the intended Business Number and check its displayed balance. Enter your consenting test recipient’s full international number in the format requested by the form.
- Fill the variables
Enter the actual values for the recipient, such as their name and order reference. Check the live preview and any media or button destination.
- Send once and check the result
Click Send Template Message. Then check the Outbound Message report and confirm receipt with your test recipient. A submitted request is not proof of delivery.
4. Check before sending to more customers
The manual send form can accept comma-separated recipients, but the variable values entered there are shared across that send. For a different name, order reference or other value per customer, use the personalised CSV guide.
Only contact recipients with the required permission and respect opt-outs. Outside the customer service window, use an eligible approved template. Sending a template does not by itself open a new 24-hour free-form reply window; that window depends on a message from the customer. See the reply-window explanation.
If a send fails, first check the template status, required variables, selected sender and credit balance. Review the message result before retrying to avoid sending the same notification twice.
Sources & related help
This iwsapp.my tutorial adapts the relevant WhatsApp procedures from our shared iSMS user guide.